
For Fireblocks’ recommended embedded wallet solution, see Dynamic Embedded Wallets. The documentation below covers the legacy Embedded Wallet APIs and SDKs.
Before you begin
Before starting your Fireblocks Embedded Wallet (EW) implementation, it’s important to distinguish between the SDKs involved:- The Fireblocks EW client SDKs (also referred to as the EW SDK and the EW Core SDK).
- The Fireblocks SDK.
- The EW SDKs consist of platform-specific SDKs used in your client app implementation
- The Fireblocks SDK can be used for administrative EW operations and is initialized with an API user’s private key. It can be used with one of two roles: EW Admin and EW Signer.
Embedded Wallet glossary
- EW: Embedded Wallet.
- Customer: A business entity using Fireblocks’ services.
- Backend: Optional server-side logic operated by the customer. Not required in the current architecture. Learn more about backend use cases.
- End User: Fireblocks customers’ end-user (i.e., the consumer).
- Device ID: A logical identifier representing an entity that stores a user key share and can participate in MPC operations for a given wallet. There is a unique identifier per SDK instance.
- Physical Device ID: A logical identifier representing a single mobile or web device.
- Passphrase: An end-user passphrase created for backup encryption.
- Master Key: A unique master key used for key share derivation.
- Key Share: One-half of the master key. Key Share #1 is at Fireblocks servers, and Key Share #2 is on the client side.
Minimum requirements
Android
- 64-bit mobile device (usually devices with at least 6GB of RAM)
- Android API version 27 (Android 8.0.1)
Distribution ABI filters
The SDK requires a minimum of 64-bit devices. Thebuild.gradle file includes the following ABI Filters:
iOS
- iOS 14 or later
Web
Fireblocks recommends using the latest versions of the following web browsers:- Google Chrome (Web, iOS, Android)
- Safari
- Microsoft Edge
- Firefox (Web, Android)
- Opera
- Android Browser
- Opera Mobile
- Samsung Internet
Step-by-step process
The process of implementing the Fireblocks Embedded Wallet (EW) involves the following step-by-step sequence:- Complete the onboarding process to establish and configure your workspace.
- Ensure comprehensive disaster readiness by completing the setup process for the disaster recovery kit.
- Create the EW Signer and EW Admin API users.
- Configure the webhook URL to enable communication between your application and Fireblocks.
- Verify that you have at least one Transaction Authorization Policy (TAP) rule to govern your EW transactions (relevant to the production environment and not sandbox).
- Set up your OAuth (SSO) configuration using your chosen Identity Provider (IDP), which will be used to authenticate end users.
- (Optional) Implement a webhook listener (e.g., for transaction updates) and notify end-user devices using push notifications or other relevant channels.
- Construct your mobile or web application and integrate the EW Software Development Kit (SDK).
- Enroll your users into the application.
- Generate MPC keys for each user with an EW.
- Execute a key share backup procedure for each user to guarantee access in case of contingencies.
- If allowed, provide the option to initiate a full key takeover and enhance control over their assets.
EW TAP rules for Production workspaces
If you’re a Fireblocks Sandbox user, your sandbox workspace’s TAP automatically has a rule that allows any end-user wallet to transfer any amount to any destination. However, if you’re a new or existing Fireblocks customer using a production workspace, you must create a TAP rule that governs end-user wallet transactions. Use the Fireblocks Console’s TAP Editor to edit this rule or create additional rules as necessary.
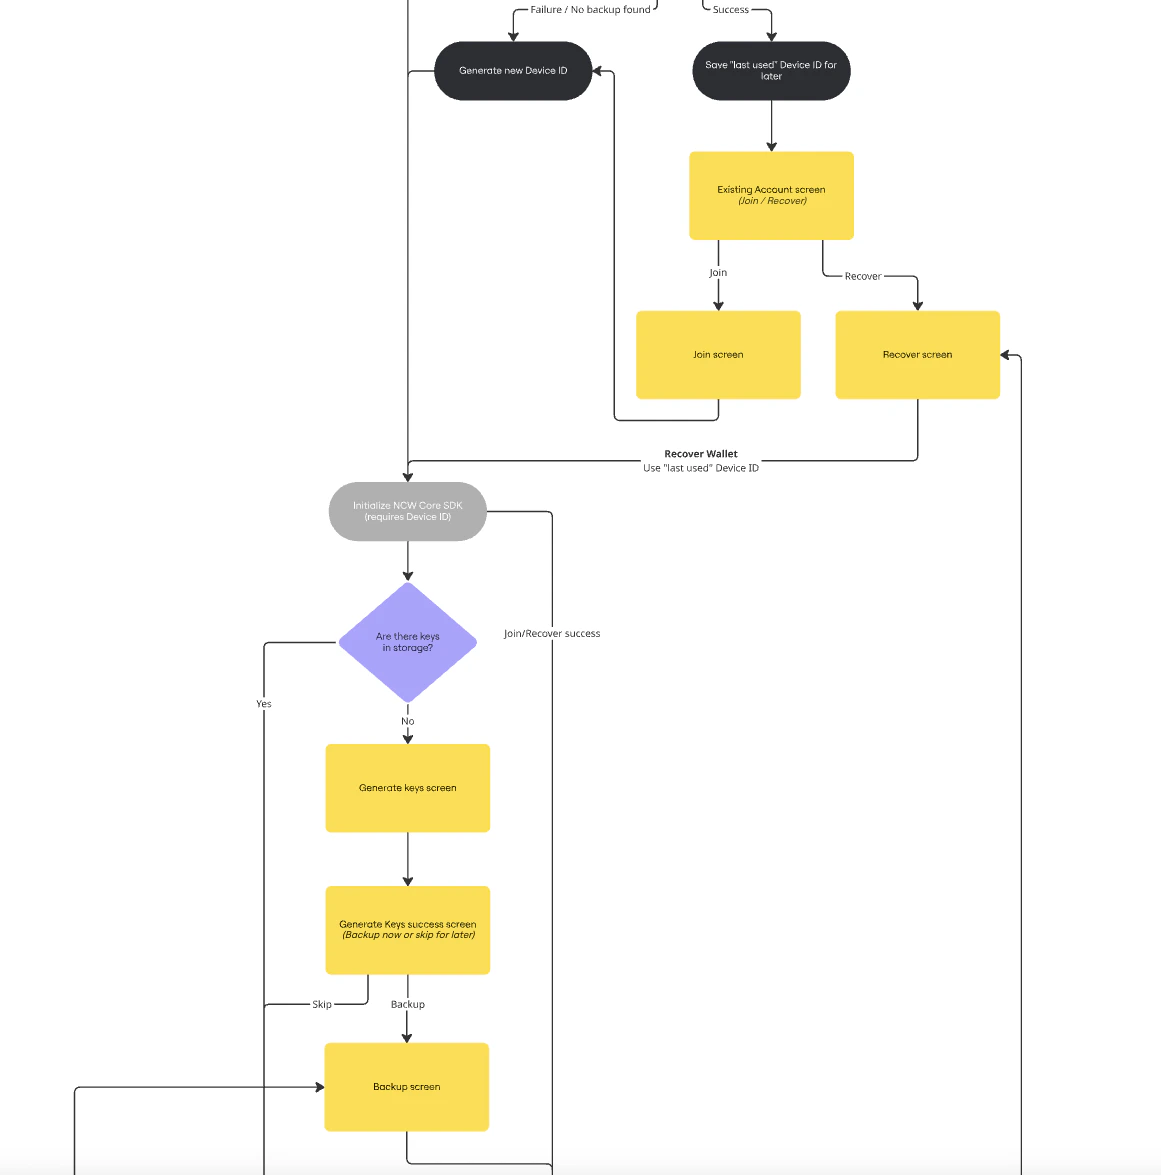
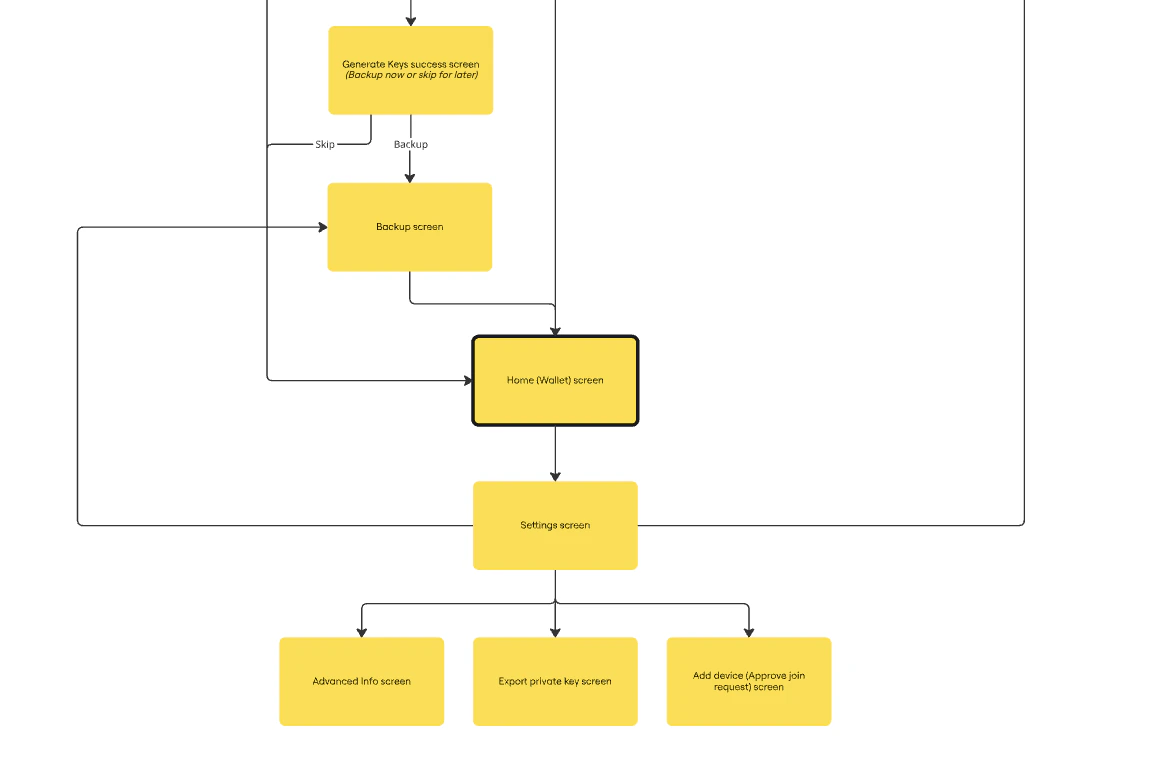
Flow chart
The following flow chart shows the successful workflow of a non-custodial embedded wallet system.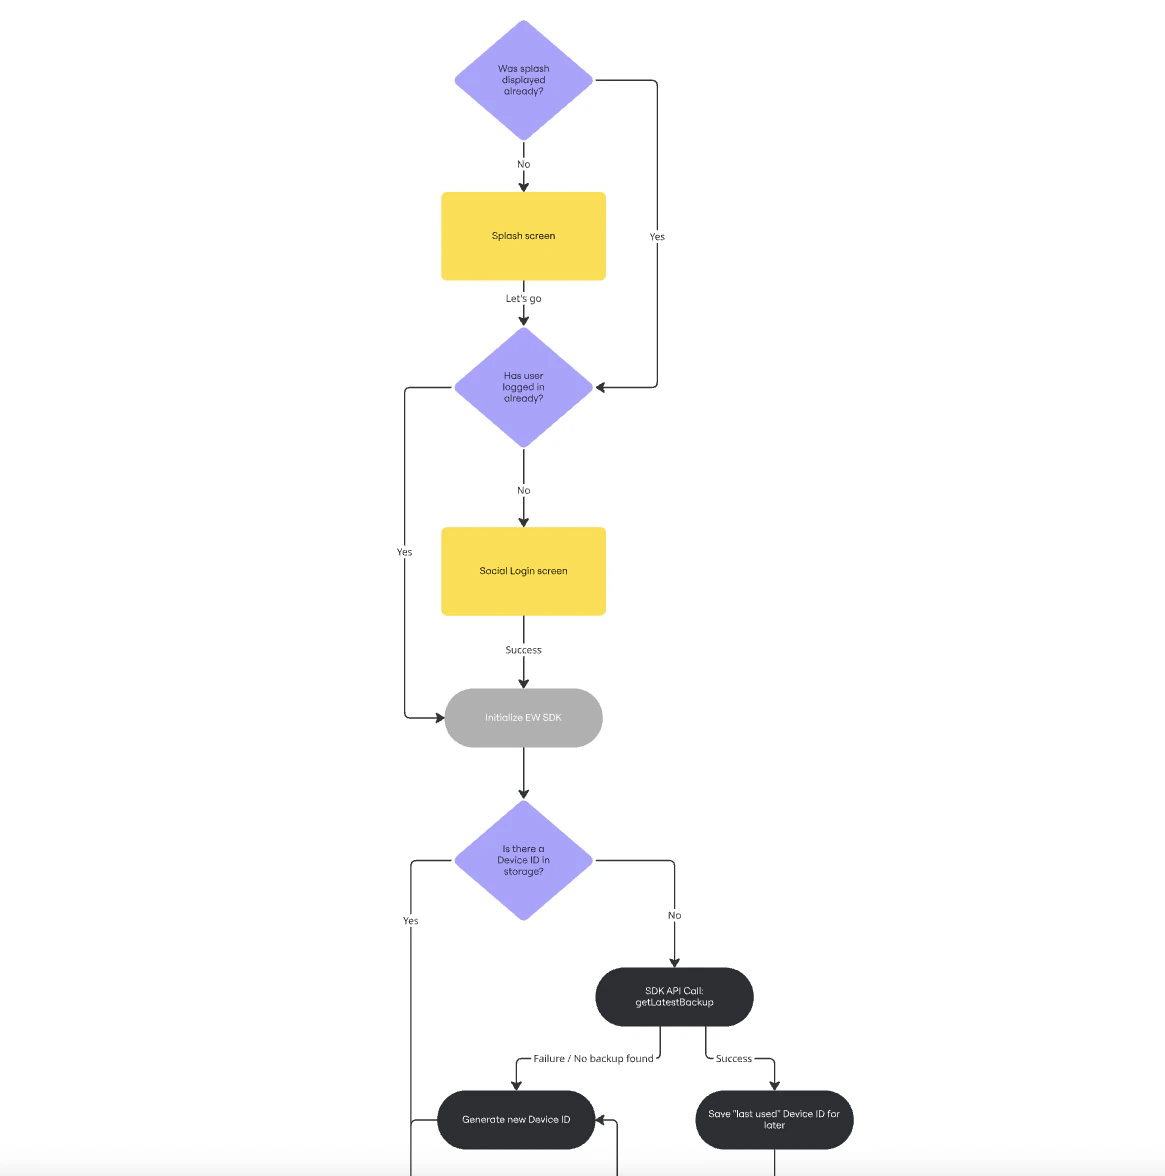
Setting up OAuth configuration (SSO)
To enable user authentication in Embedded Wallet (EW), configure your Identity Provider (IDP) using the OAuth setup in the Fireblocks Console. Once configured, Fireblocks will generate an OAuth Client ID. This ID is used to initialize the EW SDK on the client side.The EW SDK does not validate the IDP tokens itself. Instead, this setup enables Fireblocks to verify the tokens attached to end-user requests, ensuring secure authentication for all subsequent operations.
Prerequisites
- Access to your OAuth-compatible IDP.
- The EW Signer API user created in your Fireblocks workspace. For more details, see API Roles.
Supported Identity Providers (IDPs)
The following OAuth-compatible IDPs are supported for use with Fireblocks Embedded Wallets. Use the provided JWKS URI when configuring your OAuth setup.Required Configuration Fields
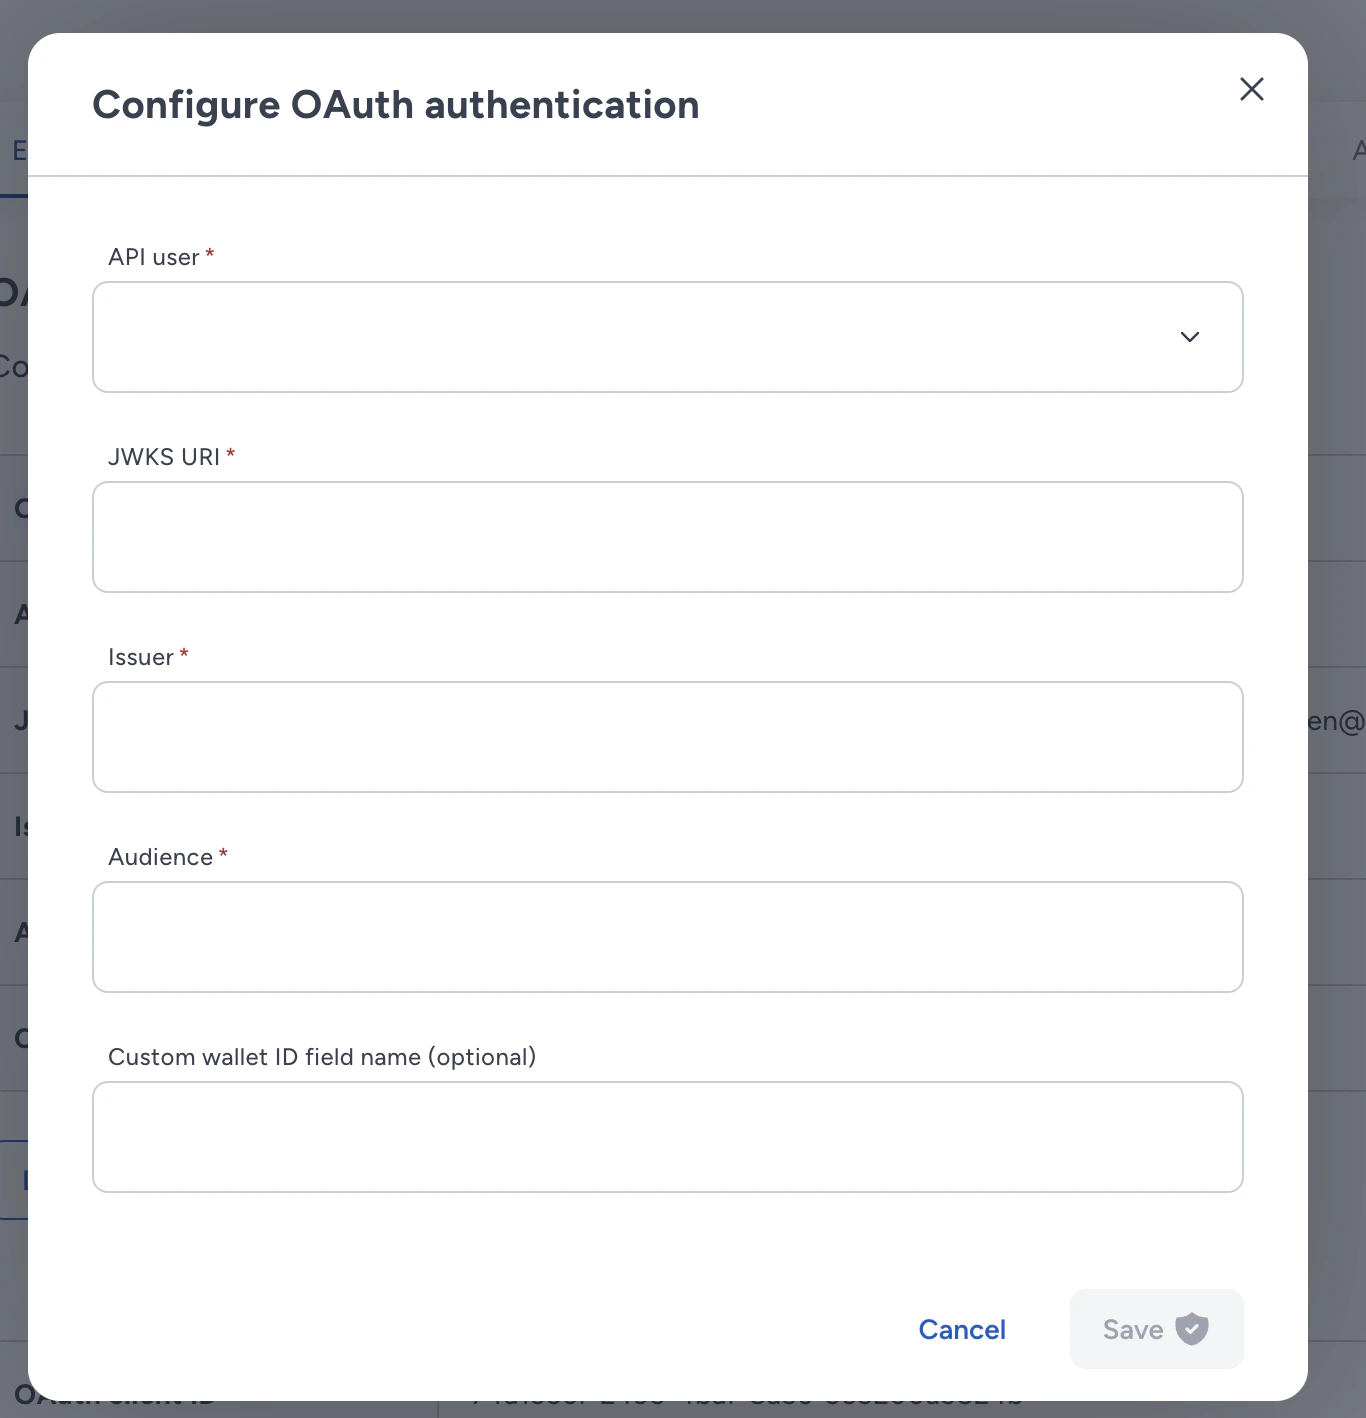
- API User – Select an API user with the “EW Signer” role.
- JWKS URI – The JWKS (JSON Web Key Set) endpoint from which Fireblocks retrieves your IDP’s public keys for token validation. see Supported Identity Providers (IDPs)
- Issuer – The expected
issclaim in the token (must match your IDP’s value). - Audience – The expected
audclaim in the token (typically your OAuth client ID). - Custom wallet ID field name (optional) – Specify the name of a custom claim in your IDP token (e.g., a Firebase custom claim) that contains the wallet ID for the user. Then if presented in the token, Fireblocks will use this claim to override the default, deterministic wallet ID calculation for this user.
Usage in the SDK: Once a configuration is added, the OAuth Client ID will appear in the Console.Use this ID when initializing the SDK.
User token generation in clients
For token generation and login UI, you are free to use your IDP’s standard login flows and SDKs.Fireblocks no longer supports the Reactive Native SDK and Flutter SDK.
SDK installation
Web SDK Installation
Install the Fireblocks “EW SDK” and “EW Core SDK” usingnpm:
Shell
yarn:
Shell
Android SDK Installation
First, add our maven repository configuration to yoursettings.gradle file:
Android
build.gradle file using the most updated bom version:
Android
iOS SDK Installation
First, in your iOS Project, add the Fireblocks Embedded Wallet SDK package: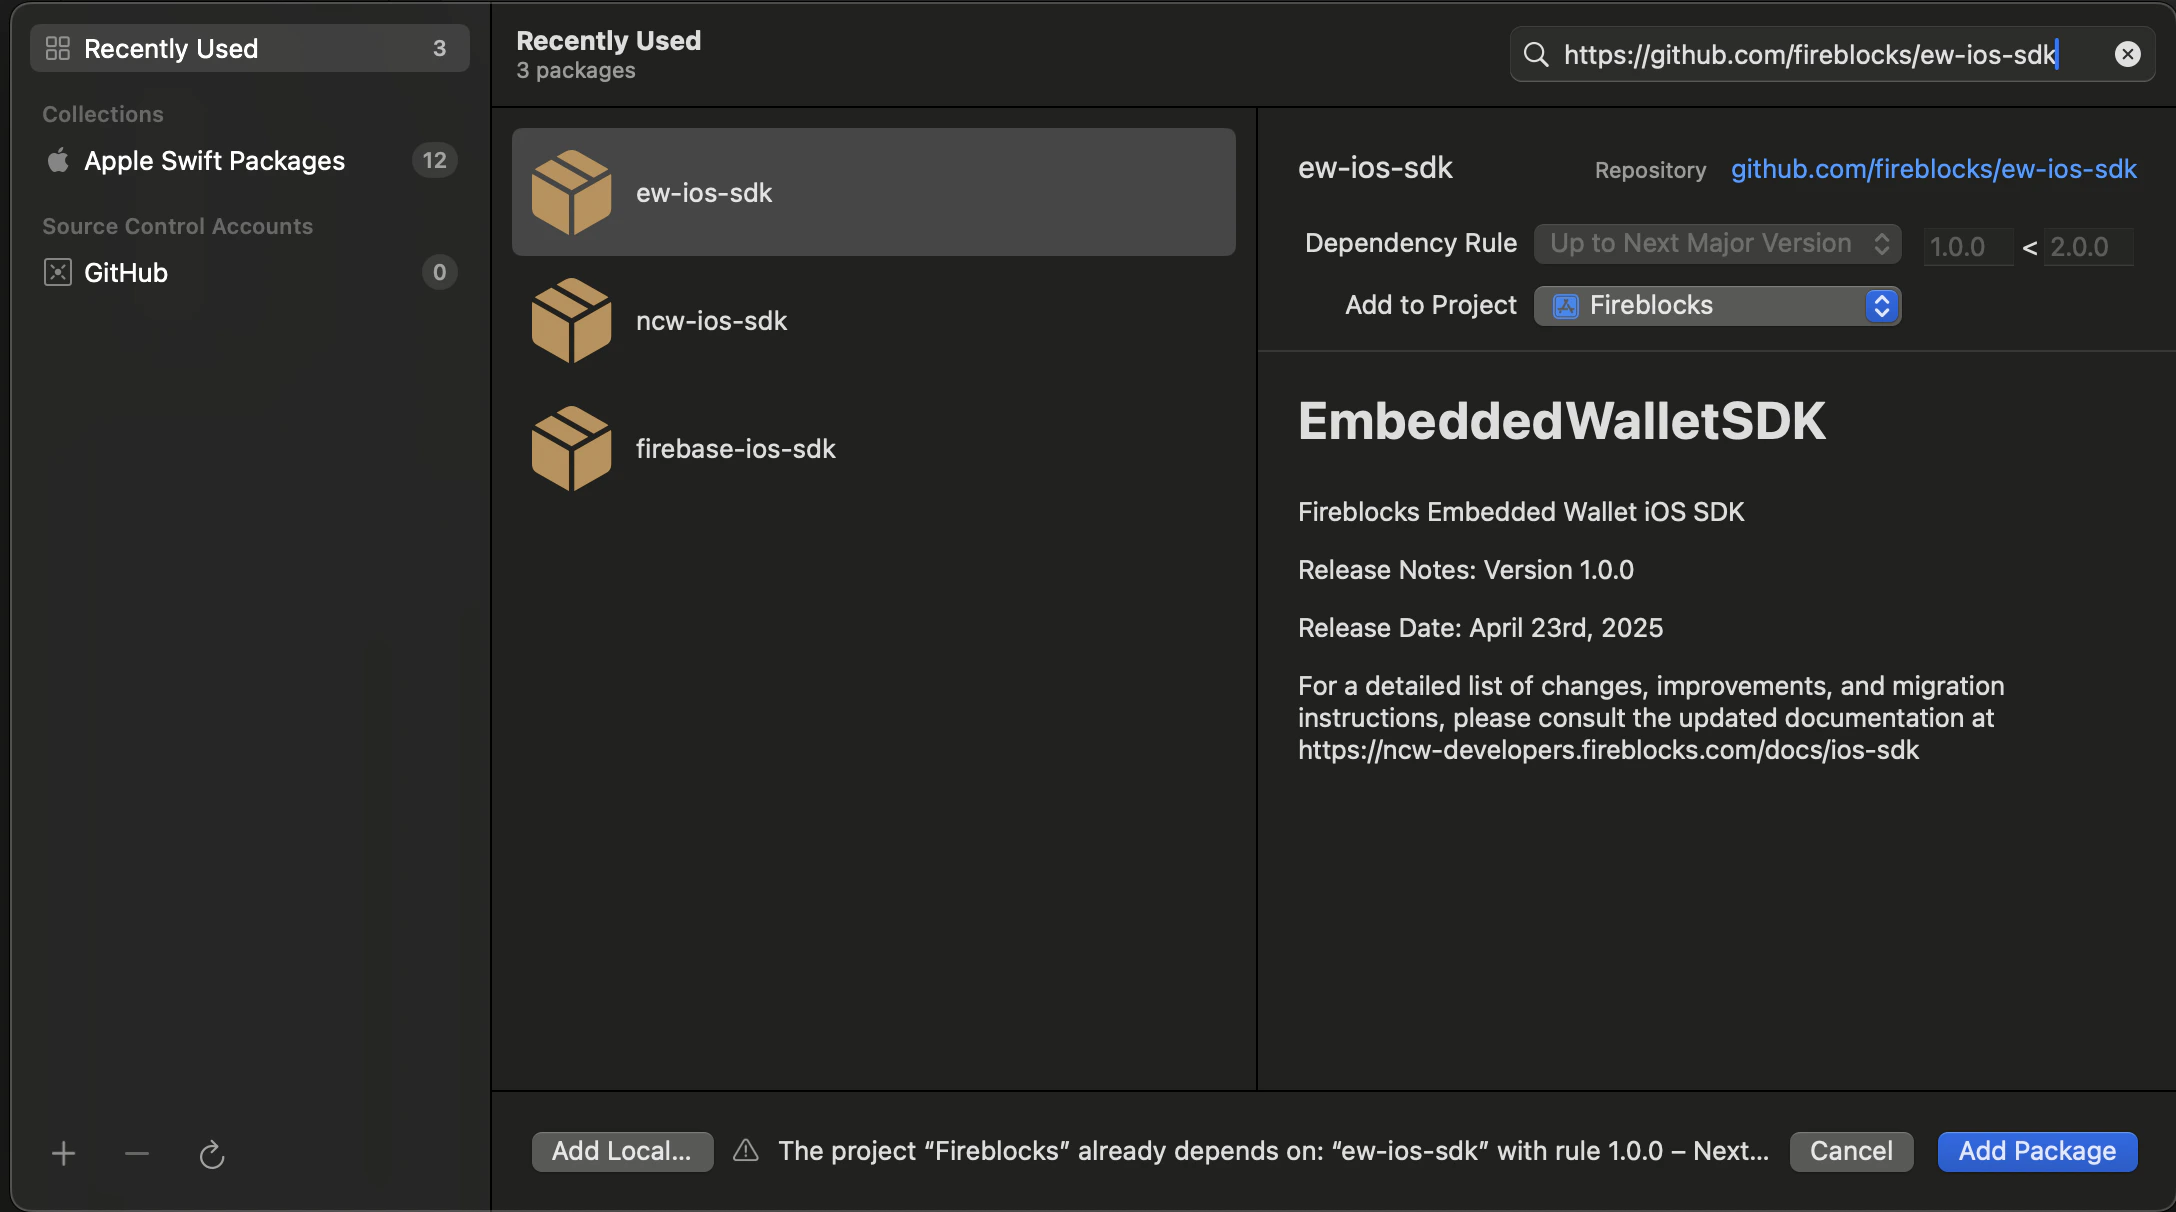
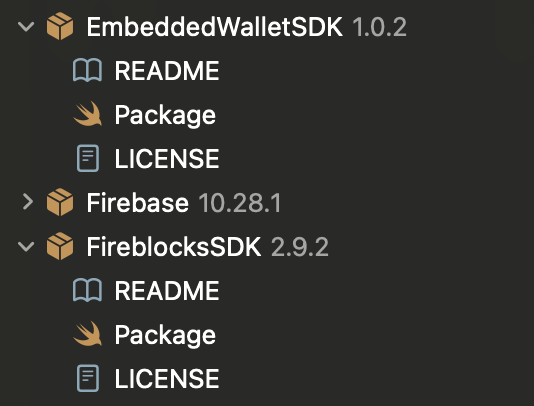
iOS