
Overview
To install a Nitro Co-signer in AWS and connect it to your workspace, follow these steps:- Setup and configure your AWS environment: Prepare your AWS environment by creating and configuring the required resources. Ensure it meets the necessary specifications and security settings.
- Add a Co-signer to the workspace using an API user: Using the Fireblocks Console or APIs, create an API user and use it to add a Co-signer to the workspace.
- Install and connect the Co-signer to the workspace: Download the installation script to the Nitro-capable EC2 machine and run the script to install the Co-signer. Once installation is complete, the workspace owner approves the new MPC key shares for the API user through the Fireblocks mobile app.
Step 1: Set up and configure your AWS environment
Proper configuration of your AWS environment is straightforward but must be performed step by step in the specified order. Any misconfiguration could compromise the Co-signer’s functionality or security.Required AWS account permissions
You must have the necessary AWS account permissions to enable network access to the required domains and to create and configure the following resources:- IAM Role
- Customer Managed Key (CMK)
- S3 bucket
- Nitro-capable EC2 machine
Step 1.1: Allowlist domains
To ensure the Co-signer can be installed and operated successfully, add the following domains to your allowlist:
Fireblocks-owned domains differ based on the specific Fireblocks SaaS environment you are connected to. If you are connected to the European or Swiss SaaS, update your allowlist according to the domains listed in the table below:
- For a better understanding of the Co-Signer’s communication with the above URLs, refer to the AWS Nitro API Co-signer Architecture article.
- If you cannot support DNS IP whitelisting with an advanced firewall or within the cloud itself, you must allow egress traffic to any destination on port 443.
Step 1.2: Set up and configure an IAM role
Identity and Access Management (IAM) roles are used to delegate access to your AWS resources. Create an IAM security role that ties everything together by granting only the necessary permissions to the specific resources.-
From the Identity and Access Management (IAM) page, select Roles and Create role. On the Select trusted entity page, select:
- Trusted entity type: AWS service
- Service or use case: EC2
- Select Next. On the Add permissions page, don’t make any selections.
- Select Next. Enter the role’s name and select Create role without changing the trust policy.
-
Select the newly created role and copy the IAM ARN for the next steps. The IAM ARN has the following structure:
arn:aws:iam::{ACCOUNT-ID}:role/{ROLE-NAME}
Step 1.3: Set up and configure an S3 bucket
Create the S3 bucket that serves as the Co-signer’s persistent storage.- From the Amazon S3 page, select Create bucket. Enter its name, leave everything else as default, and create the bucket.
- Select the newly created bucket and on the bucket’s details page, select Permissions.
- In the Bucket policy section, select Edit and copy-paste the S3 policy from the text box below.
- Select Save changes to complete the operation.
-
Select the newly created bucket and copy the Bucket ARN for the next steps. The Bucket ARN has the following structure:
arn:aws:s3:::\{BUCKET-NAME}
{BUCKET-NAME}, {ACCOUNT-ID} and {ROLE-NAME} with the correct values.
Step 1.4: Set up and configure a KMS Customer-Managed Key (CMK)
Create a Customer-Managed Key (CMK) in KMS to safeguard the Co-signer’s MPC key shares.Create the key
- Open the Key Management Service (KMS) page and select Create key.
-
On the Configure key page, select:
- Key type: Symmetric
- Key usage: Encrypt and decrypt
-
Expand the Advanced options section and select:
- Key material origin: KMS
- Regionality: Single-Region key. Note: Select the Multi-Region key only if the EC2 instance is in a different region.
- Select Next.
Add labels
- On the Add labels page, set a display name for the key in the Alias field (e.g.,
fireblocks-nitro-cosigner). - Optionally, fill in the Description and Tags fields.
- Select Next.
Configure permissions
- On the Define key administrative permissions page, leave the Key administrators section blank and leave the Key deletion option checked.
- Select Next.
- On the Define key usage permissions page, leave the Key users section blank.
- Select Next.
Finalize the key
- On the Review page, scroll down to the Key policy section.
- Paste the KMS policy in the Key policy section.
- Select Finish.
Get the key ARN
- Select the newly created key.
- Copy the KMS ARN for the next steps.
arn:aws:kms:{KEY-REGION}:{ACCOUNT-ID}:key/{KEY-ID}
Ensure you replace {ACCOUNT-ID} and {KEY-ID} with the correct values.
Understanding the policy warning
When you paste the KMS policy, you might see the following warning:Unsupported Action For Condition KeyThe following actions:
kms:GetKeyPolicy are not supported by the condition key kms:RecipientAttestation:PCR8. The condition will not be evaluated for these actions. We recommend that you move these actions to a different statement without this condition key.- The
kms:RecipientAttestation:PCR8condition is only evaluated on KMS calls that include an attestation report from the enclave. - AWS ignores the condition on actions that never carry a report in the request (such as
GetKeyPolicyandEncrypt) and emits this advisory. - Security impact: None. All sensitive operations (
Decrypt,DeriveSharedSecret,GenerateDataKey,GenerateRandom) remain protected by the PCR8 attestation check. - Functionality impact: Unaffected. This behavior is by design, and the key can be used by the Fireblocks Nitro Co-signer immediately.
Step 1.5: Edit the IAM role’s policy
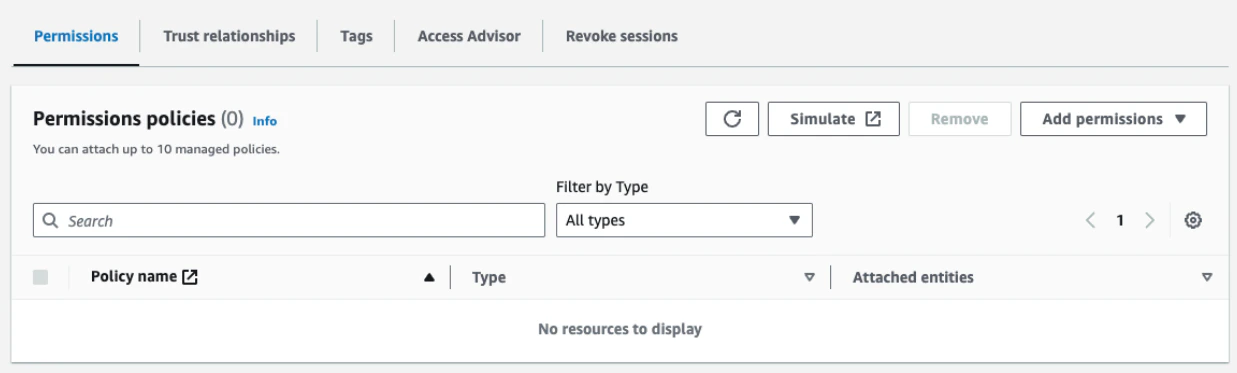
Return to the IAM service and select the IAM role you created.- In the Permissions policies section, select Attach policies, select the
AmazonSSMManagedInstanceCorepolicy, and then select Add permissions.

- In the Permissions policies section, select Create inline policy and choose JSON in the Policy editor section. Copy-paste the IAM policy below in there. Finally, create the policy and assign it a name.
{BUCKET-NAME}, {KEY-REGION}, {ACCOUNT-ID} and {KEY-ID} with the correct values.
Step 1.6: Set up and configure an EC2 instance
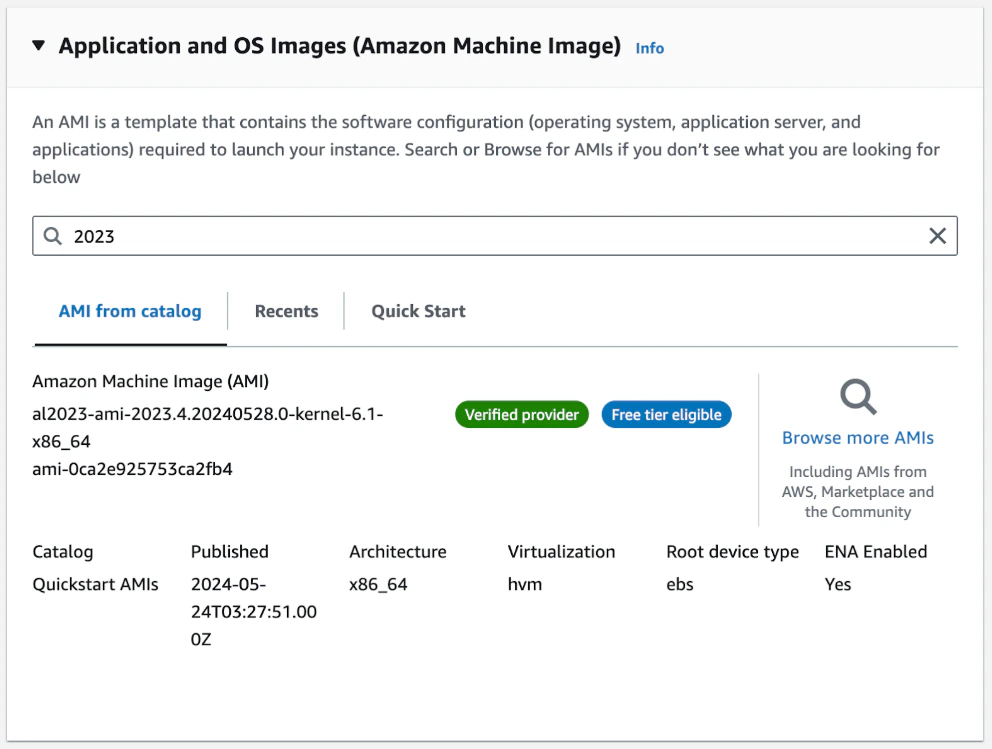
- Create a Nitro-capable EC2 instance by selecting Launch instances from the EC2 Instances page. Enter its name and choose the Amazon Machine Image (AMI) Amazon Linux 2023 AMI with 64-bit (x86) architecture.
- In the Instance type section, select
c5.xlarge(4vCPUs, 8GB RAM) orc5a.xlargeif the former is not available in your region. - In the Network settings section, set where to allow SSH traffic from. We recommend restricting access as much as possible.
- In the Advanced details section:
- IAM instance profile: Select the IAM Role you created in the previous steps.
- Nitro Enclave: Select Enable. This field will be grayed out if you selected an instance type that is incompatible with Nitro.
- Metadata version: Select V2 only (token required).
- Metadata response hop limit: Set to a minimum of 2 (two).
Step 1.7: Additional security recommendations
- It is highly recommended to control user and network access to your AWS environment and EC2 instance by properly configuring your VPC and security groups. Learn more about controlling network traffic in the AWS documentation.
- See API Co-signer security checklist and recommended defense and monitoring systems for further information.
Step 2: Add a Co-signer to the workspace using an API user
Use this guide to add a new Co-signer to the workspace. Be sure to copy-paste (or otherwise record) the following items to your notes since they are required during the installation process:- The API user’s pairing token
- The download link of the Co-signer’s installation script
Step 3: Install and connect the Co-signer to the workspace
You must have root privileges on the EC2 instance to install the Co-signerEnsure you are logged in as a root user or use
sudo to execute the installation commands.Step 3.1: Connect to your EC2 Instance
Connect to your EC2 instance with your preferred method.Step 3.2: Download and unpack the installation package
Using the download link of the AWS Nitro Co-signer installation package you copied from the Console, run thewget command to download the package directly to your machine.
Paste the appropriate URL into the following command:
Step 3.3: Run the installation script
The installation package contains an Enclave Image File (EIF) and installation scripts. To install the Co-signer, navigate to the directory where the installation package was unpacked and run:- Pairing token: Enter the API user’s pairing token that you copied from the Fireblocks Console. This token pairs the API user with the Co-signer, establishing the connection between the Co-signer and the workspace.
- S3 bucket name: Enter the name of the S3 bucket that you created before. You should only add the bucket name and not the full ARN of the bucket. For example: If your bucket ARN is
arn:aws:s3:::{BUCKET-NAME}, you need to enter only{BUCKET-NAME}. - CMK ARN: Enter the Amazon Resource Name (ARN) of the CMK that you created before.
The Nitro cosigner installation script installs the below components as services
- cosigner
- cosigner-networking
- cosigner-logging
- cosigner-env-export